

Complete Guide To Micro-Sprinkler Irrigation Systems
Micro sprinklers, in comparison to micro drip systems, distribute a rotating stream of heavy water droplets over a larger area, deliver more water more quickly and offer a much higher flow rate. Use Micro sprinklers to create a fully customisable low volume irrigation system for landscaped garden environments or garden beds where plants are more tightly packed. Spray patterns are capable of penetrating more dense foliage and can cover many plants from just one emitter. They are quick to set up in comparison to underground irrigation systems but, emit low precipitation rates making them more suitable for longer watering times with less run off and therefore, less water wastage.
This Guide Contains:
A Quick Guide to Micro Sprinklers
Micro Sprinkler System Features
Setting Up a Micro Sprinkler Irrigation System
Micro Sprinkler Quick Assembly
Planning a Micro Sprinkler Irrigation System
A Quick Guide to Micro Sprinklers
Key Features of Micro Sprinklers
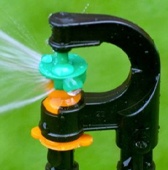
Standard Flow Rate: Micro sprinklers with a consistent flow rate emit a fixed output from the outlet, perfect for watering, flat gardens or plants with similar consumption requirements.
Adjustable Flow Rate: Can be adjusted from 0 to full L/h output allowing you full control and flexibility of water flow to best suit your plant’s needs. Adjustable micro sprinklers are altered by simply rotating the in-built valve by hand - no tools required.
Pressure Compensating: Ensure a consistent flow rate regardless of pressure or elevation in the system. Every sprinkler emits exactly the same amount of water whether it is at the beginning or end of the system. Suitable for more complex garden layouts.
Guide to Flow Rate
40 - 120 L/h – Offer the lowest litre per hour output and have a shorter throw radius than higher output sprinklers. They create the perfect climate most suitable for watering young plants, seedlings, bedding plants and smaller shrubs.
120 - 250 L/h – Produce a higher output of water and a longer throw radius than lower output sprinklers. Most suitable for shrub plants, newly planted and more established trees, vegetable plots and more dense flower beds.
250+ L/h – Emit larger volumes of water and have a throw distance up to 11.5 metres. They offer the perfect solution for plants that require more water and for irrigating larger areas, such as, vineyards, orchards, agricultural and more commercial applications.
Please Note: Above is an approximate guide to watering. When you are designing a Micro Sprinkler system, research how much water each plant requires and customise sprays to suit.
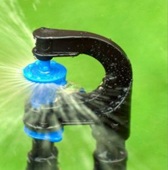
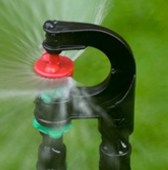
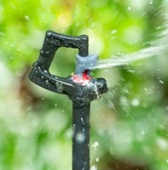
Spray Patterns
90º Sprinklers - The perfect solution for watering garden corners, around patios or where paths are situated. They produce an accurate 90° angled output to avoid any overspray and ensure minimal water wastage.
180º Sprinklers - Create a semi/half circle spray pattern ideal for use along the edge of a garden bed or along a walled/fenced area. Perfect for avoiding any unnecessary water wastage as water only emits around the perimeter of the garden rather than being dissipated to areas where water is not required.
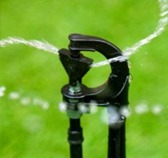
270º Sprinklers - Produce a unique spray pattern perfect for watering any hard to reach areas or irregular shapes around a corner. An unusually patterned sprinkler that helps to avoid any missed areas.
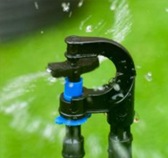
Rotating 360º Sprinklers - Ideal for placing in the centre of a large garden bed or lawn area for full circle watering.
Building a Sprinkler System
When planning your micro sprinkler system, you need to allow for plenty of overlap of spray to ensure complete coverage. Ensuring the spray patterns of micro sprinklers overlap, safeguards against the risk of any plants not being watered even if an emitter becomes clogged. Use 90°, 180°, 270° and 360° angled sprinklers to create a system that allows for this overlap.
Micro Sprinkler System - Features

Conserve Water
A Micro Sprinkler system uses water more effectively yet still ensures thorough irrigation from a system that is individually tailored for complete water coverage no matter how complicated the garden layout. Conserve precious water resources and protect the environment by using an irrigation system that is able to dramatically reduce water consumption for more sustainable garden watering methods.

Automated Irrigation
Micro sprinklers can be programmed automatically using a Tap/Water Timer. Install the timer at the start of a system at the water source and set it to the times and frequency required for irrigating plants. Automating a watering system means you no longer have to spend time watering your garden - you don’t even need to remember to turn on the tap!
Top Tip: Set timers to water early morning or late evening to avoid any water wastage from evaporation during the mid-day sun.

Flexible Watering
Micro sprinklers are the ultimate customisable solution for complete garden watering. If you enjoy seasonal planting or switching and changing your garden layout throughout the year, a Micro Sprinkler system means you can easily change the system to suit a new layout. A Micro Sprinkler system can also be easily adapted or expanded using multiple irrigation emitters such as, micro drippers that work at the same bar pressure.

Optimal Working Pressure
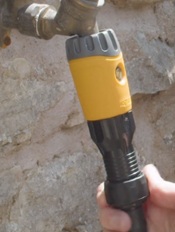
Micro sprinkler systems work best at water pressures around 1.5 - 3 bar. The water pressure from your tap usually exceeds the required pressure for a Micro Sprinkler to function optimally. To prevent risers from popping out from supply tubing, use a Pressure Reducer at the start of your system to regulate the pressure to the correct level.
Setting up a Micro Sprinkler Irrigation System
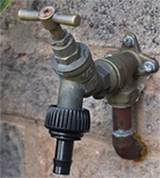
1. Starting From the Tap
Begin by attaching a Back Flow Preventor to avoid contaminating your drinking water source. For full automation, install a Tap Timer followed by an Irrigation Filter to prevent dirt and small particles from entering and damaging the sprinklers.
A Pressure Reducer should then be installed to the filter to regulate the pressure to the correct level.
Top Tip: Multiple filters can be installed throughout an irrigation system. Our range of irrigation filters can be installed using either a quick-click or barbed connection for complete versatility.

2. Supplying a Micro Sprinkler System
Hose Pipe: Use a Garden Hose Pipe to transport water from the tap to an Irrigation Supply Pipe. Hose pipes are more flexible so can easily bend around corners without the need for connectors. Simply thread a quick-click Tap Connector to the outlet of the Pressure Reducer and attach the hose using a Hose End Connector. Direct the length of hose pipe to where it will join the sprinkler system and attach another Hose End Connector.
Install an Irrigation Filter just before connecting the garden hose to the system by installing a Male Adaptor into the hose end connector and use a Snap-on Filter with a barbed end to attach LDPE Irrigation Pipe.

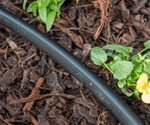
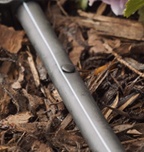
LDPE Pipe: Micro sprinkler systems can be supplied directly using LDPE Irrigation/Supply Pipe installed straight from the tap. Simply attach a Barbed Tap Connector to the tap set-up. Barbed tap connectors can be threaded directly onto the tap, timer, pressure reducer or filter for easy connection to LDPE supply pipe.
Top Tip: Upon receiving your LDPE pipe, weigh it down using a brick at both ends, unwind it carefully and let it settle on the grass for an hour. This allows the pipe to become more flexible to work with.
3. Using Connectors
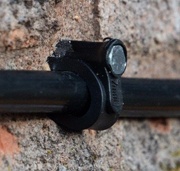
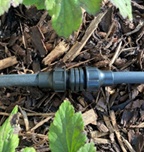
Avoid trip hazards by attaching LDPE pipe and micro-pipe to the wall/fence at any height using Wall Clips or Saddle Clamps to keep your pipe work tidy and discreetly tucked out the way.
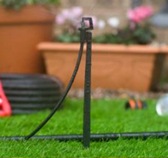
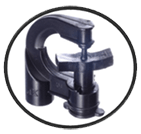
Pipe Stakes anchor the pipe in place to ensure micro sprays point directly to where they need to water. Place a pipe stake either side of a rigid riser for extra stability. Pipe stakes are available in sizes 13mm-25mm and 4mm.
Make sure you use a Fold Over End Stop/End Plug at any open end of your system to maintain the pressure.

Direct pipe around corners using Barbed Elbows or change direction using Barbed Tees. A Mixed Fittings Pack is a great solution for all requirements.
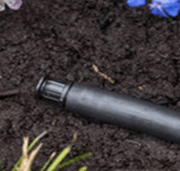
Micro Sprinkler Quick Assembly
Pre-Assembled Micro Sprinklers

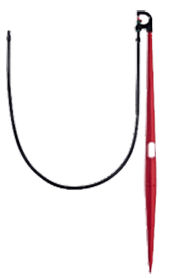
If you are looking for quickest possible installation solution, Pre-assembled Micro Sprinklers arrive complete and ready to use with a sprinkler head, ground stake, built-in hole punch, micro-pipe and 4mm barbed fitting.
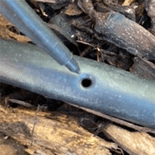
The stake features a spiked end that can be used to pierce a hole into the LDPE pipe – no need for extra tools! Simply push the barbed joiner into the wall of the pipe and push the stake into the ground where required.
Threaded Micro Sprinkler
Our 4mm Threaded Inlet Sprinklers can either be installed using a Pre-Assembled Stake Adaptor or Rigid Riser. Both require installation by simply piercing a hole in the pipe using a Hole Punch and inserting the 4mm inlet attached to the riser/adaptor into the pipe.
Install a Threaded Micro Sprinkler head into to the top of the ground stake/riser; the perfect solution for customising the system. Secure the pre-assembled stake adaptor using a built-in ground stake or if using the riser method, purchase a Ground Stake that directly clicks into the riser.
Top Tip: Rigid risers offer complete flexibility when choosing where to place a Micro Sprinkler as risers can be installed into micro pipe up to 4m away from the main supply and easily connected using a 4mm Barbed Joiner.
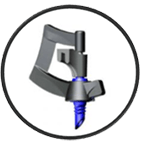
Push Fit Assembly
The Push Fit Micro Sprinkler System is simple to use as each component features a push fit connector that joins together easily creating a water tight seal.
Begin by taking your chosen Push Fit Micro Sprinkler Head and install a length of Pre-Assembled Sprinkler Micro Tubing into the winged shaped colour coded rotor. Sprinkler Micro Tubing is available in different lengths up to 100cm for ultimate flexibility when choosing where to install a sprinkler head.
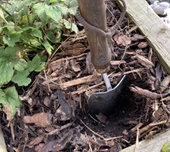
Next, install the blunt end of the Sprinkler Spike into the built-in channel on the side of the rotor. The pointed end of the spike can be installed into the ground for a reliable and stable hold ensuring sprinkler heads produce accurate spray patterns.
Top Tip: Sprinkler spikes are available in 40cm and 50cm heights and offer the perfect solution for raising the height of sprinkler heads so watering can take place either above or below the foliage canopy. Increasing the height of sprinkler heads also increases the throw distance/radius output from the sprinkler head.
The Micro Tubing can be fed through the built-in cut out of the spike that functions to hold the micro tubing in place when water is fed through the system. This prevents movement further up the spike to the sprinkler head further ensuring an accurate spray pattern from the sprinkler.
Install the assembled sprinkler into the main LDPE supply pipe by first piercing a 4mm hole in the pipe using a Hole Punch. To create a connection, use a Push Fit to Barbed Adaptor and install the push-fit side of the adaptor into the end of the Micro-Tubing. The barbed end of the adaptor can be installed into the hole created in the main supply pipe.
Planning Your Micro Sprinkler Irrigation System
Planning Tips
Begin by sketching a rough plan of your garden layout indicating your water source and labelling planting areas/individual plants you would like to water.
Next, mark on your plan where you would like to place your Micro Sprinklers taking into account the spray pattern.
Top Tip: Create a compass drawing of your system plan by drawing quarter circles for 90° sprays, half-circles for 180°, three-quarter circles for 270° and full circles for 360°.
Pencil in the throw radius in metres depending on your flow rate and use a combination of angled sprinklers in conjunction with each other to create a customised garden watering system.

When planning your system, buy more Barbed/Nut Lock Connectors, Micro Sprinkler Heads, Ground Stakes, Adaptors, Pre-Assembled Micro Tubing and Risers than you think you will need in case you need to replace them over time.
You will also need to measure both the size of the area you would like to water and the distance between each watering area. Add this to your plan as this will indicate the length to cut the LDPE pipe. Take into account components you will need to direct pipe line around corners in the garden and any Stakes and Wall Clips required to keep pipe neatly tucked out of the way and avoid any trip hazards.
Top Tip: Print out and use graph paper to plan and design a system tailored to your garden.
Example Sketch and Flow Rate Calculation

Use the below calculation to work out your flow rate in Litres per hour then divide this figure by the Litres per hour your Micro Sprinkler emits. This will tell you how many Micro Sprinklers can be run from the tap.

Example Emitter System
A domestic tap that outputs around 9 litres of water per minute will, therefore, output around 560 litres per hour. 7-8 Micro sprinklers emitting 70 l/h can be installed in one zone (540 divided by 70)
Installation Tips and Run Lengths
How Long to Run a Micro Sprinkler System
Whilst planning a Micro Sprinkler system, bear in mind that over-watering or underwatering can put plants under unnecessary stress. It is advisable to research how much water your plants require to remain healthy and thriving. Finding out this information will indicate how often and for how long you will need to run a Micro Sprinkler system.
Follow the below guide for approximate timings to run a system during the warmer months. For top tips on how to care for your system in Winter, our next section will tell you all your need to know.

To find out a run time most suited to your garden’s watering needs, start by running your system two or three times a week for 10 minutes. After each watering cycle, check the water has penetrated the soil to a depth of at least 8 inches.
The soil should be damp but not saturated. If the soil is still dry, increase the run time rather than the frequency.
Top Tip: Cover the soil in mulch or bark to avoid water loss through evaporation. This is especially important during the Summer months when the sun is at it’s warmest.
Hints and Tips
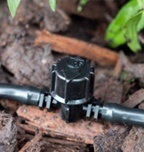
For more a more flexible irrigation system tailored to your garden, connect a 4mm Vari-Flow Valve in the Micro-Pipe before the Micro Sprinkler. Using a valve means water flow can be adjusted or turned off to suit specific watering requirements of a plant.
To install simply cut a 4mm micro pipe where the valve will be installed and insert the micro pipe onto the built-in barbed inlets.
Changed Your Mind or Your Garden Layout?
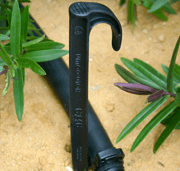
Micro sprinklers can be easily adapted and moved to a new location if you change the placing of potted plants or your garden design. Simply remove the sprinkler from the pipe, use a Goof Plug to plug the existing hole and a Hole Punch when placing Micro Sprinklers in new locations.
Stronger Connections
For a more robust and longer-lasting system, use Nut Lock Fittings in place of barbed connectors. These fittings feature an internal barb plus a threaded nut which clamps onto the pipe. The perfect solution for a longer-lasting more robust system.
Maintaining Your Sprinkler System
Autumn/Winter Protection
A Micro Spray System does not need to be taken apart during the winter months. All you need to do is follow the two steps below:

1: Water/Tap Timers, Filters and Pressure Reducers are more delicate items that will need to be protected in colder weather. Before the first frosts, clean your filter and pressure reducer in a bucket of water and empty any water out.
Empty your Timer of any sitting water, remove the batteries and store it upright in an undercover garage or shed. Keep in mind you may need to replace more delicate items in your system every 1-2 years.
2: To reduce the impact of thawing and freezing inside your pipe line remove any End Stops/Plugs/Caps from your system to allow any sitting water to drain out.
Top Tip: To prevent any insects crawling inside the system and blocking emitters, replace the end plugs once all the water has drained away.
Repairing a Micro Sprinkler System
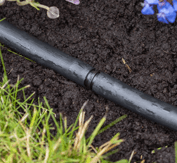
After some time or when digging in the garden, LDPE supply pipe may split or crack and develop a leak. To repair the system, remove the hole/leak using pipe cutters saving as much of the LDPE pipe as possible.
Then, use a Barbed Joiner/Nut lock Joiner to re-connect and repair the pipe. You may wish to turn the system on at the tap to test this connection is water tight.
Hints and Tips
In order to keep a Micro Sprinkler system running at its peak, you will need to carry out some occasional basic maintenance.
Firstly, ensure the filter remains clean and the internal mesh screen is intact. To do this, unscrew the filter cover to reveal the internal mechanism and clean out any debris using a bucket of clean water.
Next, walk around your system to check each emitter is working correctly and does not need cleaning or replacing. To ensure your Micro Sprinkler system is working efficiently, visually look to see that water is spraying from each outlet. A Micro Sprinkler that is not emitting any water may mean the internal mechanisms require cleaning or you need to flush the system.

During the installation process and every time you flush the system, you will need to remove spray heads from the rigid risers.
Regularly flush the system by removing the End Stops/Plugs and turning on the tap flushes out debris circulating around your Micro Spray system. Repeating this process twice a month keeps your system working at its peak and prolongs the life of your emitters.
Top Tip: Remember to replace the end plugs after this process.

