

Installing a Micro Stream Dripper Irrigation System
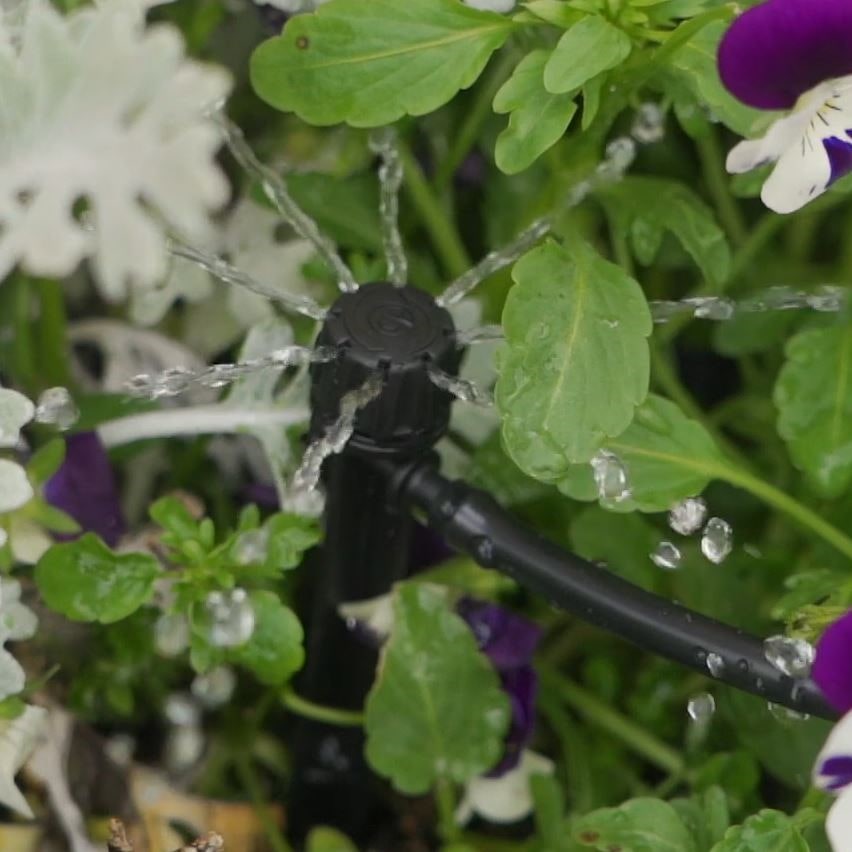
Stream Drippers, also known as Shrubblers, produce up to 8 drip streams from multiple outlets located around the head of the dripper. They output more water over a larger area compared with micro-irrigation drippers that produce only a single drip pattern making them ideal for irrigating larger plants with higher consumption requirements, such as shrubs and trees. Additional benefits of stream drippers are their ability to water more directly to a plant’s root zone whereas micro-sprays and sprinkler systems are not capable of producing such accurate watering patterns.
This Guide Contains:
A Quick Guide to Stream Drippers
Tips for Installing a Stream Dripper System
Micro Stream Dripper Irrigation Set Up
Stream Dripper and Shrubbler Quick Assembly
Planning your Stream Dripper and Shrubbler Irrigation System
A Quick Guide to Stream Drippers
Stream drippers can be installed in-line directly into the wall of LDPE pipe or arrive complete with stake either in an in-Line or end-of-line assembly. End-of-Line drippers have one barbed inlet and can be placed at the end of a line of drippers in a large planter or singularly in pots. In-Line drippers have barbed inlets on either side to allow for a continuous flow of water. Multiple in-Line drippers can be set up in a long chain to water a trough/large planter.
Guide to Flow Rate

Up to 25 L/h Output - Suitable for watering plants with lower consumption requirements such as bedding plants and small shrubs.
Up to 50 L/h Output - For larger plants/shrubs that need more water to thrive including, vegetable plots and borders.
Stream Dripper Patterns
180º Sprays - Create a semi/half circle spray ideal for use along the edge of a garden planter or along a walled/fenced area.
360º Sprays - Ideal for placing in the centre of a large garden planter or garden bed for full circle watering.
Key Features
Adjustable Stream Drippers: Allow you to regulate and control your system as each turn/click indicates an increase or decrease in flow rate. The dripper can also be turned off when not needed. Suitable for gardens with plants that require varying amounts of water.
Pressure Compensating Stream Drippers: Ensure a consistent flow rate regardless of pressure or elevation in the system. Every dripper emits exactly the same amount of water whether it is at the beginning or end of the system. Suitable for more complex garden layouts.
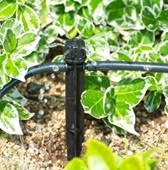
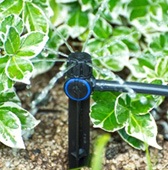
Spike-Mounted Stream Drippers: Provide a secure way of fixing the dripper in the desired watering area. The stake can be pushed into the ground at the most suitable height for your plant. Spike mounted drippers are attached to the supply pipe using 4mm Micro-Pipe which is extremely flexible and offers plenty of movement when placing your dripper.
Please Note: The above is an approximate guide to watering. When designing a Stream Dripper system, research how much water each plant requires and customise sprays to suit.
Tips for Installing a Stream Dripper System

Working Pressure
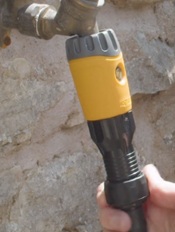
Stream dripper systems work best at water pressures around 1.5 bar to 3.0 bar. The water pressure from your tap usually exceeds the required pressure for a Stream Drip system to function optimally. It is, therefore, recommended to use a Pressure Reducer at the start of your system to regulate the pressure to the correct level.

Automate Your Watering
Stream drippers can be programmed automatically using a Tap/Water Timer. Install the timer at the start of a system at the water source and set it to the times and frequency required for irrigating plants. Automating a watering system means you no longer have to spend time watering your garden - you don’t even need to remember to turn on the tap!
Top Tip: Set timers to water early morning or late evening to avoid any water wastage from evaporation during the mid-day sun.

Water-Saving
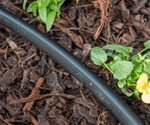
Conserve water and protect the Earth’s most precious resources by installing a Stream Dripper system that can use up to 90% less water than manual watering and sprinkler systems. Position drippers to deliver more targeted watering and accurately deliver water towards the roots of the plant where it is needed most.

Easy to Connect System
Stream drippers can be easily adapted if you change the placing of your potted plants or garden design. Simply remove the dripper from the pipe, use a Goof Plug to plug the existing hole and use a Hole Punch when placing drippers in new locations. You can also easily extend your system by adding more supply pipes and connecting more drippers.
Micro Stream Dripper Irrigation Set Up
Step 1: Starting From the Tap
Begin by attaching a Back Flow Preventer to avoid contaminating your drinking water source. For full automation, install a Tap Timer followed by an Irrigation Filter to prevent dirt and small particles from entering and damaging the drippers.
A Pressure Reducer should then be installed to the filter to regulate the pressure to the correct level.
Top Tip: Multiple filters can be installed throughout an irrigation system. Our range of irrigation filters can be installed using either a quick-click or barbed connection for complete versatility.

Step 2: Supplying a Micro Stream Dripper System
Hose Pipe: Use a Garden Hose Pipe to transport water from the tap to an Irrigation Supply Pipe. Hose pipes are more flexible so can easily bend around corners without the need for connectors. Simply thread a quick-click Tap Connector to the outlet of the Pressure Reducer and attach the hose using a Hose End Connector. Direct the length of the hose pipe to where it will join the stream drip system and attach another Hose End Connector.
Install an Irrigation Filter just before connecting the garden hose to the system by installing a Male Adaptor into the hose end connector and using a Snap-on Filter with a barbed end to attach LDPE Irrigation Pipe.

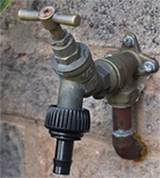
LDPE Pipe: Micro stream drip systems can be supplied directly using LDPE Irrigation/Supply Pipe installed straight from the tap. Simply attach a Barbed Tap Connector to the tap set-up. Barbed tap connectors can be threaded directly onto the tap, timer, pressure reducer or filter for easy connection to LDPE supply pipe.
Top Tip: Upon receiving your LDPE pipe, weigh it down using a brick at both ends, unwind it carefully and let it settle on the grass for an hour. This allows the pipe to become more flexible to work with.
Step 3: Connectors
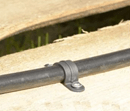
Avoid tip hazards by attaching LDPE pipe and micro-pipe to the wall/fence at any height using Wall Clips or Saddle Clamps to keep your pipework tidy and discreetly tucked out the way.
Pipe Stakes anchor the pipe in place to ensure micro stream drippers point directly to where they need to water. Place a pipe stake on either side of a rigid riser for extra stability. Pipe stakes are available in sizes 13mm-25mm and 4mm.
Make sure you use a Fold Over End Stop/End Plug at any open end of your system to maintain the pressure.

Direct your pipe around corners using Barbed Elbows or change direction using Barbed Tees. A Mixed Fittings Pack is a great solution for all your barbed fitting needs.
Stream Dripper and Shrubbler Quick Assembly
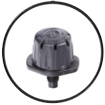
4mm Barbed Inlet
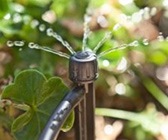
HydroSure 4mm Barbed Stream Drippers offer secure, close to the ground installation that minimises the risk of the stream dripper becoming dislodged and ensures targeted watering exactly where the plants need it most – the roots. Installation takes only a matter of seconds, yet promises a highly efficient method of irrigating plants without the hassle – the ultimate time-saving solution.
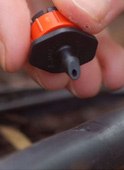
4mm Threaded Inlet
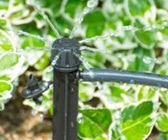
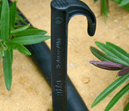
HydroSure 4mm Threaded Stream Drippers can be installed in multiple ways – ideal for building a fully customisable irrigation system. Install directly into the wall of LDPE pipe or with a Rigid Riser or Pre-Assembled Stake Adaptor.
For accurate watering closer to the root zone, install directly into LDPE Pipe by simply piercing a 4mm hole using a Hole Punch and twist the threaded inlet on the stream dripper into the hole created. When watering larger shrubs and multiple plants from one emitter, install into a Stake Adaptor to raise the height of the stream dripper and increase the throw diameter.
In-Line Installation
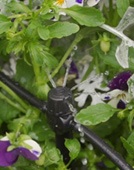
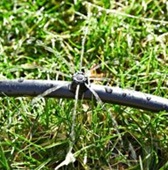
In-line stream drippers should be installed one after the other in a daisy chain type pattern using 4mm Micro Pipe. Simply install a 4mm Barbed Joiner into the wall of the LDPE pipe supplying your system. Push a length of micro pipe onto the 4mm barb now sticking out of the LDPE Pipe. The barbed inlets and outlets of In-line stream drippers can be supplied with water using more lengths of 4mm micro pipe.
Top Tip: Don’t forget to cap off the end of your row of stream drippers using either a 4mm Goof Plug or an End of Line Spike Stream Dripper.
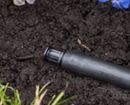
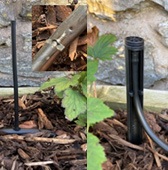
End-Of-Line Installation
End of Line Stream Drippers can be installed either on their own in pots or planters or at the end of a row of in-line stream drippers. Spike Stream drippers installed using a 4mm micro pipe can be installed in lengths up to 4 metres! This allows for complete flexibility when choosing where to place stream drippers to water your plants.
Top Tip: Rigid risers offer complete flexibility when choosing where to place a stream dripper as risers can be installed into micro pipe up to 4m away from the main supply and easily connected using a 4mm Barbed Joiner.
Barbed Dripper Installation
Threaded Drip Installation
In-Line Installation
End-Of-Line Installation
Planning your Stream Dripper and Shrubbler Irrigation System
Planning Tips
Begin by sketching a rough plan of your garden layout indicating your water source and labelling planting areas/individual plants you would like to water. Next, mark on your plan if you will need on-line, In-Line or End of Line Stream Drippers and if you need these to be Adjustable, Pressure Compensating or Spike Mounted.
Top Tip: When planning your system, buy more Stream Drippers than you think you need in case you purchase more plants and want to expand your irrigation system.
You will also need to measure both the size of the area you would like to water and the distance between each watering area. Add this to your plan as this will indicate the length you need to cut your pipe. Take into account components you will need to direct your pipeline around your garden, any Valves you may require to control water supply and any Stakes and Wall Clips you may need to keep pipe tucked out of the way and avoid any trip hazards. Use the below graph paper to plan and design your system.
Click Here For Graph Paper - 1cm x 1cm
You may find our Guide to Connectors and Pipe Line a useful tool when building your system.
How Long to Run your Stream Drip System
Run your Drip-System less frequently and for a longer length of time for deeper soil penetration and healthier plants. Not only does this decrease the chance of evaporation and uses less water but also means water is available to the roots for longer.
Avoid running your drip system for short periods more frequently as roots stay near the surface and dry out more quickly making plants more subject to stress and disease.
To find out a run time most suited to your garden’s watering needs, start by running your system two or three times a week for 20 minutes. After each watering cycle, check the water has penetrated the soil to a depth of at least 8 inches. The soil should be damp but not saturated. If the soil is still dry, increase the run time rather than the frequency.
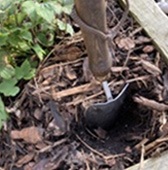
Top Tip: Cover the soil in mulch or bark to further avoid water loss through evaporation. Make sure you don’t bury the drippers as dirt can get into the mechanisms of drippers reducing their performance.
Example Micro Stream Dripper Plan

Calculating Water Flow Rate
Use the below calculation to work out your flow rate in Litres per hour then divide this figure by the Litres per hour your stream drippers emit. This will tell you how many Drippers can be run from the tap.

Example Emitter System
A domestic tap that outputs around 9 litres of water per minute will, therefore, output around 560 litres per hour.
•27-28 Drippers emitting 20 LPH can be installed in one zone (540 divided by 20)
•13-14 Drippers emitting 40 LPH can be installed in another zone (540 divided by 40)
Maintaining Your Stream Drip System
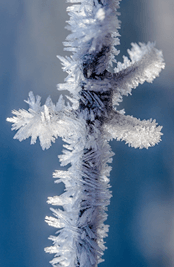
Autumn/Winter Protection
A Stream Drip System does not need to be taken apart during the winter months. All you need to do is follow the two steps below:
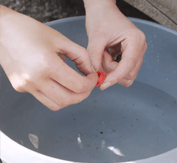
1: Water/Tap Timers, Filters and Pressure Reducers are more delicate items that will need to be protected in colder weather. Before the first frosts, clean your filter and pressure reducer in a bucket of water and empty out any sitting water.
Empty your Timer of any sitting water, remove the batteries and store it upright in an undercover garage or shed. Keep in mind you may need to replace more delicate items in your system every 1-2 years.
2: To reduce the impact of thawing and freezing inside your pipeline remove any End Stops/Plugs/Caps from your system to allow any sitting water to drain out.
Top Tip: To prevent any insects crawling inside your system and blocking emitters, replace the end plugs once all the water has drained away.
Repairing your Stream Drip System
After some time or when digging in the garden, your LDPE supply pipe may split or crack and develop a leak. To repair your system, remove the hole/leak using pipe cutters saving as much of the LDPE pipe as you can. Then, use a Barbed Joiner/Nut lock Joiner to re-connect and repair your pipe. You may wish to turn the system on at the tap to test this connection is watertight.
Caring For Your System in Spring/Summer
To keep your Micro Stream Drip system running at its peak, you will need to carry out some occasional basic maintenance.
Firstly, ensure the filter remains clean and the internal mesh screen is intact. To do this, unscrew the filter cover to reveal the internal mechanism and clean out any debris using a bucket of clean water.
Next, walk around your system to check each emitter is working correctly and does not need cleaning or replacing. To ensure your system is working efficiently, visually look to see that water is spraying from each outlet. A micro stream drip that is not emitting any water may mean the dripper requires cleaning or you need to flush the system.
Unclogging Stream Drippers
Stream drippers feature an easy-clean removable cap that can be easily unscrewed to reveal the internal mechanisms. To clean the drippers, pull the dripper from the pipe, remove the cap and clean inside the dripper by placing it under running water. The dripper can then be reassembled and re-inserted into the pipe.
Regularly flush the system by removing the End Stops/Plugs and turning on the tap flushes out debris circulating around your system. Repeating this process around twice a month keeps your system working at its peak and prolongs the life of your emitters.
Top Tip: Remember to replace the end plugs after this process.
Cleaning An Irrigation Filter
Repairing Split Irrigation Pipe
Flushing An Irrigation System

Some of my Stream Drippers are not working!
Common Problems
• Stream Drippers not emitting along the length: Check the water flow rate from the tap outputs enough water for each emitter’s requirements. Check your Water Pressure and Flow Rate using our guide. Example: If the flow rate from your water source is 540 Litres per hour and you are using Stream Drippers that output 40 Litres per hour, you can use up to 13 emitters in a single run from your tap (Flow Rate Divided by Emitter Output).
• Structural Damage: Digging in the garden can pierce the wall of the pipe feeding the Stream Drippers and will affect emitter performance. Walk around your system whilst it is switched on checking for any visible damage or pooling indicating the pipe has split. Damaged irrigation pipe is easily replaced by cutting out the damaged pipe using Pipe Cutters and re-connecting using a Barbed Joiner.
• Pressure Loss: Make sure any open end of the supply pipe network is plugged using an End Cap. This maintains water pressure at the correct level for emitters to function.
My Stream Drippers keep clogging and blocking!
Depending on the calcium concentration or naturally occurring sediment levels of water in your area, emitter outlets may block more often. Using an Irrigation Filter at the start of your system and throughout as an In-Line Installation can trap small particles and prevent these particles from reaching your drippers.
Dry spots and some drippers not working: Over time emitters can become clogged with insects or dirt. Flush the system by removing the end caps and switching on the water flow to flush debris. Most Stream Drippers can also be removed from the pipe, disassembled via a screwcap, cleaned under running water and replaced into their original position.
Can I install Stream Drippers into a hosepipe? And can I use a drill to pierce the pipe?
Hosepipe is manufactured from flexible PVC that when punctured to insert a Stream Dripper tends to fray the surface and does not create a watertight seal. When inserting into the wall of irrigation pipe, LDPE Pipe features a more rigid wall that the barbed inlet of a Stream Dripper can lock into. This produces a watertight connection without leakage or the risk of dislocation. Alternatively, use alongside Micro Pipe and insert the barbed inlet of a Stream Dripper into the internal bore.
HydroSure Barbed Stream Drippers feature a 4mm inlet. To insert this inlet into the wall of LDPE Irrigation Pipe and create a watertight join, a 4mm Irrigation Hole Punch must be used as a drill or screwdriver, for example, would generate an irregular sized hole causing water to leak around the connection point. Any unwanted leakage around connection points causes pressure loss inside the system that reduces the performance of emitters.
Can I buy more Stream Drippers to extend my current system?
If you already have an irrigation system in place, purchase more Stream Drippers and lengths of Irrigation Supply pipes to extend your system and connect using a Barbed or Nut Lock Joiner. Alternatively, 4mm Joiners and Micro Pipe can be used to tap into the wall of LDPE Pipe to take drippers up to 4 metres away from the main supply.
Top Tip: For full automation and to split garden watering into zones, connect your system to a Multiple Outlet Water Distributor or Dual Outlet Irrigation Timer.
I can’t get irrigation tubing to fit over my Stream Drippers
Barbed Stream Drippers have a tapered edge that allows Micro Pipe to slide onto the inlet whilst the sharp barb locks the pipe into place. Stream Dripper inlets often look much bigger than the internal pipe bore however, this is necessary to create a water-tight seal with no leaks at the connection point.
Top Tip: Creating this join requires a lot of force. For easy installation, carry a flask of hot water and dip the pipe into the hot water for up to 10 seconds. This makes the pipe more malleable and easier to push onto the barb. As the pipe cools, it contracts tightly around the barb producing a water-tight seal.
How do I hold irrigation pipe and Stream Drippers in position?
Before setting up a Stream Drip irrigation system, uncoil the irrigation pipe making sure it does not kink. Weigh it down either end with a brick and allow any bends to settle. This process makes irrigation pipe easier to work with when placing it in position in flower beds. The pipe can then be secured into place every metre and at either side of where an emitter is positioned using Pipe Stakes.
Mini Sprinklers vs Drip Line
Stream Drippers and Drip Line solutions both offer the ability to regulate water flow based on your plant’s water consumption requirements. Drip Line is easier to set up and install compared to individually placing Stream Drippers however, Stream Drippers provide the option to choose where to place them rather than being confined to the pre-set spacings of Drip Line. When using a Stream Drip system there is also the option to choose between a variety of available features allowing full customisation of your irrigation system.
180° and 360°: Use 180° Stream Drippers to create a semi/half circle spray ideal for use along the edge of a garden planter or a walled/fenced area or 360° Stream Drippers for full circle watering of a large garden planter or garden bed.
Adjustable: Control water output and switch off drippers altogether.
Pressure Compensating: Ideal for use with hanging baskets, raised planters and sloped garden layouts.
Will a Stream Drip System over winter or does it need to be removed?
HydroSure Stream Drippers are manufactured from weather resilient high-grade poly-propylene with UV Additives for long life and protection against deterioration even when subject to harsh climates and sunlight. For this reason, Stream Drippers can remain in position over the winter months.
Top Tip: To avoid the impact of thawing and freezing, remove the End Caps from your irrigation pipe and allow water to run through the system for around 2 minutes to flush out any debris. Turn the system off and wait for the water to drain before replacing the end pieces.
My Stream Drippers won’t stay in the irrigation tubing and keep popping out!
Stream Drippers work best at pressures around 1.5 to 3 Bar. The water output from most garden taps usually exceeds this pressure causing dripper displacement from micro tubing or LDPE pipe. For this reason, it is essential to use a Pressure Reducer at the start of your system to regulate pressure to the correct level for drippers to function.
How many Stream Drippers do I need to water my garden?
Stream drippers produce a wetting pattern of up to 80cm in diameter. It is advisable to space the drippers apart so the wetting pattern from one dripper meets the location of where another is in situ.
Example: A Stream Dripper producing a wetting pattern of 80cm should be spaced 40cm apart both widthways if installed in rows and lengthways in a linear pipe formation. This ensures wetting patterns overlap and eliminates the risk of dry spots/underwatering.

