

Winterising an Irrigation System
As Autumn approaches, it is a good idea to think about preparing your irrigation system for the season ahead. Winterising Your System helps to prolong the life of all components and provides peace of mind as the temperatures start to drop.
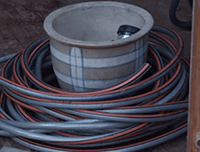
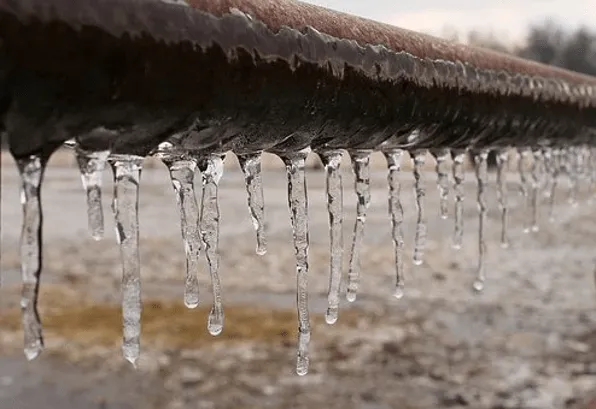
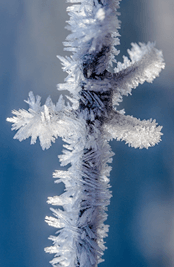
When water freezes, it expands, and this expansion can cause Irrigation Pipes, Fittings and Hose Connectors to crack. Removing enough water will help protect your system.
Winterising is key for any system, whether it contains a Hose Pipe, Drip Line, Soaker Hose, Micro Emitters, or more complex Pop-Up Irrigation Systems. As each irrigation system is different, we recommend referencing operating instructions for the installed irrigation system as well as following our product-by-product guide.
Protecting an Outdoor Tap in the Winter
If you can isolate the outdoor water supply from the indoor, you may wish to shut off the supply to your outdoor tap to prevent freezing. Then, remove any accessories or connectors from the tap and place them in a box in an undercover shed/garage during the winter months.
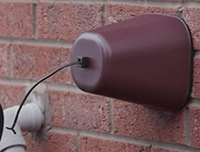
It is imperative that you keep your tap well protected against the cold. An outdoor tap cover will keep any outdoor tap insulated and is quick and easy to fit, with an adjustable press and pull-tight locking system. An alternative is to invest in a HydroSure Frost Proof Bib Tap, designed to withstand extremely cold temperatures year after year.
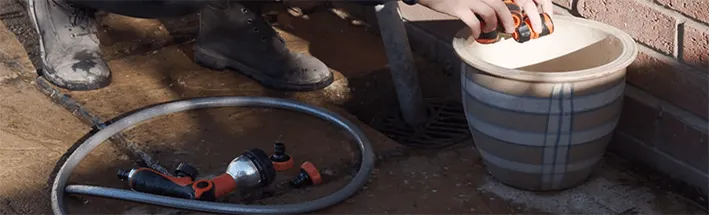
Some of the more delicate items will need to be protected in colder weather and bought in before the first frost to prevent damage:
- Remove Backflow Preventers or Pressure Reducers from the tap/system and drain any sitting water from the unit.
- Irrigation Filters require unscrewing from the tap and removal if they appear elsewhere in your system. Empty any sitting water from the unit and remove the external filter sleeve to reveal the internal mesh. Once dismantled, clean any debris out from the inside and ensure the mesh is free from tearing and damage.
Even with great care, more delicate items have a lifespan of approximately 1-2 years so it is advisable to replace them after this period to keep your system operating at its peak.
Top Tip: Damaged items may reduce pressure in your system or prevent it from working correctly in other areas. It is important to replace any items ahead of next season that are not working correctly or may have cracked or become damaged over the season.
Flushing/Draining An Irrigation System
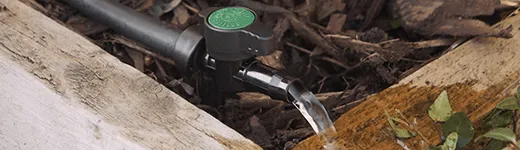
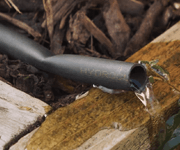
To manually drain, find the ends of your system, and fully drain the water out - this will prevent water from freezing and damaging the system.
- We recommend using End Sleeves or a Back Valve to easily open the end of the system to aid drainage. This will prevent the need to remove more difficult barbed end plugs from the pipe that inevitably need time spent replacing each season.
- Ensure you seal up the open lines afterwards to prevent insects from making their way inside the pipes.
- Adding a layer of mulch over the irrigation lines will also provide additional insulation.
There are various ways to drain the water from pipes and sprinklers. You can use a manual valve, or automatic valve, or use compressed air to blow throughout the system.
- We recommend employing a professional service when using compressed air, as this method requires extreme care. Large commercial sites and golf courses usually use the air blow out method. Compressed air is used to force water through the system from pipes to sprinkler heads.
- You do not need to use compressed air if your irrigation lines are buried on a slight downhill gradient.
- Opening the drain valves at the end of each zone at the lowest point will allow the water to naturally flow to the end of the system.

Click a product to learn more:


Winter Protection for a Soaker Hose
Detach from the Water Source
Unlike garden hose pipes, a Soaker Hose can remain in situ over the winter months. There is no need to bring the soaker hose into the shed or garage – another time-saving benefit of using soaker hose irrigation. The porous layers allow water to continually seep from the hose removing the need to drain the system.
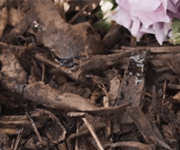
To ensure a longer-lasting soaker hose, lightly cover the hose in a layer of mulch. Covering in mulch rather than soil insulates the hose from harsh weather and protects the hose against clogging.
Safe Storage
Whilst a soaker hose can be left outside during colder weather, your connectors cannot be.
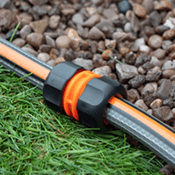
Remove any Hose Connectors connecting the soaker hose to a Hose Pipe or to the tap. Place these connectors in a shed, garage or any undercover area and bring them out again as the weather begins to warm up.
Connectors: Where you have removed any connectors, place a marker so you can locate where you need to replace them next season.
Soaker Hose: If you have buried the hose under mulch, use markers such as plant labels to protect the hose from being speared if you are digging or aerating your garden.
Preparation for Next Season
Looking ahead to when we can get back outside and enjoy our summer gardens, your soaker hose system will need some reviving.
Re-attach your system to the tap and re-place any End Plugs/Caps removed in Autumn.
You will need to check your barbed connectors have survived the winter months and have not cracked. To tell if you need to replace connectors, you will visually be able to see water leaking from and around the connections.
Top Tip: Purchase spare Barbed Tees, Joiners, Stakes and Elbows in case yours do not survive over winter.
Winter Protection for a Garden Hose Pipe
While Hydrosure Hose Pipes are made from high-quality materials and constructed for ultimate reliability and durability, you will need to care for your hose pipe during the harsh winter months to ensure long life.
Autumn/Winter Protection
During the Autumn and Winter months, remove any Connectors from the hose and empty it of any sitting water by working your way along its length, holding it as high as you can. (See Video Below).
If water is left inside the hose, it will undergo a process of freezing and thawing during the colder weather. This forces the walls of the hose pipe to bulge and damages the hose structure. Store your hose pipe and connectors inside a shed or garage over Winter or if there is a risk of frost to protect your hose pipe from frost damage and extend the life of your hose.
Hose Pipe Repairs
With repeated use, your hose pipe may split or crack and develop a leak. This does not mean you need to throw away your hose pipe instead, remove the hole/leak (saving as much of the hose as you can) using Pipe Cutters. Then, use a Hose Joiner to re-connect and repair your hose pipe.
Winter Protection for a Micro Irrigation System
A Micro Irrigation System does not need to be taken apart during the winter months.
If you have a water timer, empty it of any sitting water, remove the batteries and store it upright in an undercover garage or shed. To reduce the impact of thawing and freezing inside your pipe line, remove any End Stops/Plugs/Caps from your system to allow any sitting water to drain out.
To prevent any insects crawling inside your system and blocking emitters, replace the end plugs once all the water has drained away.
Basic Maintenance
In order to keep your micro emitters running at their peak, you will need to carry out some basic maintenance before and after the first frosts.
Walk around your system to check each emitter is working correctly and does not need cleaning or replacing. To ensure your micro emitter system is working efficiently, visually look to see that water is emitting from each outlet. A micro emitter that is not emitting any water may mean the outlet requires cleaning or you need to flush the system.
Top Tip: Some micro emitters can be taken apart and re-assembled for easy cleaning.
Repairing Your Micro Irrigation System
During the harsh winter months, your LDPE Supply Pipe may split or crack and develop a leak. To repair your system, remove the hole/leak using pipe cutters saving as much of the LDPE Pipe as you can. Then, use a Barbed Joiner/Nut Lock Joiner to re-connect and repair your Pipe. You may wish to turn the system on at the tap to test if this connection is watertight.
Flushing the Micro System
You will need to flush the system regularly, but also before you turn your system off during the winter months and before you turn it back on in Spring.
Top Tip: Remove spray heads from the Rigid Risers before flushing out a micro-spray system.
Regularly flush the system by removing the End Stops/Plugs and turning on the tap, flushing out debris circulating around your microsystem and prolonging the life of your emitters.
Top Tip: Remember to replace the end plugs after this process.
Winter Protection for Garden Hose Storage
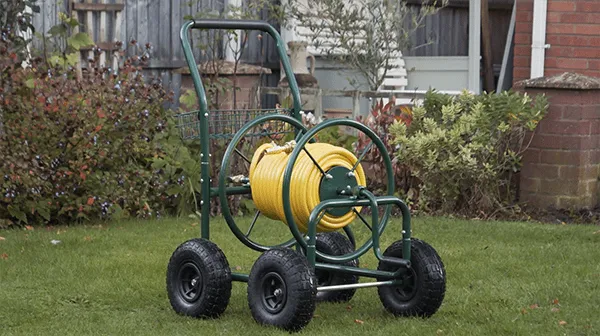
Hose Cart or Reel
Items manufactured solely from aluminium, stainless steel and brass can be left outside during winter weather although it is best to bring it indoors. Some hose storage, however, contains plastic elements so will need to be protected over winter.
If using a Hose Cart or Reel, detach the leader hose from the water source and place a frost tap protector over the tap. Remove the leader hose from the hose cart and unscrew the connectors if they are meant to be separated from the hose. Drain the leader hose of any sitting water.
Next, pull the hose from the reel and remove any connectors attaching your hose storage to your hose pipe. For more information on how to protect your hose pipe during the winter months and more, click here.
Once the hose pipe has been removed from the reel or cart, turn the handle to allow any sitting water inside the internal mechanisms to drain away. Sitting water can freeze and thaw inside your hose storage and cause delicate components to crack as the temperatures plummet.
Hose Hanger
If using a Hose Hanger, you may wish to remove any fixings holding the hanger to the wall, place these safely in a bag and store the hanger undercover ready for re-assembling next year.
Top Tip: Have a winterising box in which you store all your gardening tools, garden hose pipes, connectors and irrigation components that need protection over the harsh winter months. Place this winterising box inside an undercover shed or garage.

Winter Protection for a Drip Line System
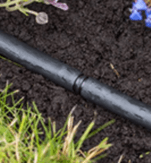
Unlike Garden Hose Pipes, Drip Line can remain in situ over the winter months, saving valuable time as the nights draw in.
As you are able to leave the Drip Line outside, it is important to take the following actions to protect the rest of the Drip Line system.
Flushing and Draining a Drip Line System
You will need to flush the system by removing any End Sleeves/End Plugs and then turning on the tap. Allowing the water to flow through the pipe freely will flush out any potential debris circulating around the pipe and complex labyrinth emitters.
Top Tip: Using a Back Valve ensures an easy, time-saving method of flushing your system, with a simple twist on-off operation.
Draining a Drip Line System
After you have flushed the system, we recommend turning off the tap to allow the water to fully drain from the pipes. It is important to drain as much water as possible. Water expands when it freezes, which can cause damage to pipe and components.
We recommend adding fold over end stops to the end of the pipe to close the system and reduce the risk of insects entering the pipeline. Removing enough water from the system will allow you to leave the system in place during colder weather.
Top Tip: Allow the system to drain for up to an hour to ensure as much water flows from the system.
Disconnecting Drip Line from the Water Source
It is essential you protect your water source and remove any timers, pressure reducers and back flow connectors from the tap. Carefully drain all accessories and components and place in a water tight box and store in a dry place over the winter months. We advise keeping all of the components together in a labelled box for ease of set up in Spring.
Top Tip: If you are using a tap timer, store in an upright position and remove batteries.
Protecting a Drip Line System from Frost
To ensure a longer-lasting Drip Line system, lightly cover the Drip Line in a layer of mulch, paying particular attention to any joiners or connectors. Covering in mulch rather than soil insulates the Drip Line from harsh weather and prevents emitters from clogging.
We recommend using an outdoor tap cover to insulate and protect your tap from dropping temperatures, or alternatively, a HydroSure Frost Proof Bib Tap will withstand extremely cold temperatures year after year.


This is also a great time to extend your system further, plan and purchase additional lengths, stakes and connectors. We recommend Nut Lock Connectors to provide added flexibility in setting up, creating bespoke watering solutions to suit your need.
This is also a great time to extend your system further and plan and purchase additional lengths, Stakes and Connectors. We recommend Nut Lock Connectors to provide added flexibility in setting up and creating bespoke watering solutions to suit your needs.
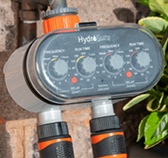
Maintaining an Irrigation Timer
Autumn/Winter Protection for a Water Timer
At the end of a watering season, remove the Timer from the tap, take out the Batteries and allow any sitting water to drain away from the unit. Remember, batteries should be disposed of/recycled in line with local council guidance. When removing the batteries, ensure the timer is not turned upside down.
To prolong the life of a water timer, before the first frosts or before the temperature drops below 1°, place the timer in a garage, shed or any undercover area that is sheltered from dampness. Be sure the timer is stored in an upright position to protect internal mechanisms from any water damage.

HydroSure Water Timers are fitted with a built-in mesh filter that can be removed for cleaning purposes. Keeping the filter clean is vital to maintain timer function and prolong the life of a tap timer by ensuring small particles do not cause blockages inside the valves which may hinder the function of your irrigation system.
Cleaning the filter will depend on how your irrigation timer is constructed. To retrieve the filter on most timers, remove the ring nut by unthreading it from the inlet of the timer. The cap can sometimes be completely removed from the unit and the filter retrieved from there. Often the filter might be built into the rubber seal which can be removed. Wash the filter in a bucket of water/under running water to remove any debris from the mesh. Remember to replace the filter back inside the tap timer.
Caring For Your System in Spring/Summer
Just before the beginning of a watering season, purchase new good quality Batteries compatible with the water timer you are using. A fresh set of batteries will ensure your water timer will work at its peak and last throughout the watering season. Avoid using rechargeable batteries as these tend to hinder the functions of water timers.
Most timers feature an LED light located at the front of the unit that can indicate the condition of the batteries. Most tap timers, for example, flash quickly or the light is constantly on if the batteries need changing. It is worth reading the instructions that arrive with your tap timer and become familiar with warnings the timer may give off if the battery is running low.
It is vital to maintain the timer by ensuring it’s batteries are in full working order as a battery fail could mean your system could be constantly on or may not switch on at all!
Top Tips for HydroSure Timer Maintenance
Hydrosure Timers have a water resistant outer layer that protects against rain water. The timer should only be installed above ground and should not be submerged under water as this will impair the internal workings.
If you are placing your timer in a position that might be susceptible to dust, algae formation or heavy rainfall, our HydroSure Dual Outlet Water Timer and HydroSure Water Tap Timer feature a flip-down cover with built-in UV protection.
